We went to Target a week or so back and they had the cutest Halloween tea towels. They are 18X18. And I got to thinking that they would make great pillow covers! I played around a little bit with ideas and finally came up with something!
I have made envelope pillow covers before with just one piece of fabric. But I knew I would have to use 3 separate pieces to do this. And guess what? It worked! I made 2 Halloween pillow covers with 2 tea towels from Target Dollar Spot!
The first thing that I did was figure out what I wanted the backs of the pillow covers to look like. These tea towels came with an extra tea towel each. I could have just used the extra tea towel as the back. But I had a buffalo check fabric that I wanted to use instead (And I used the 2 extra tea towels else where)
I laid out my tea towel from Target and ironed it. I wanted it to be as flat and straight as possible. (Also leaving it face up for the next steps)
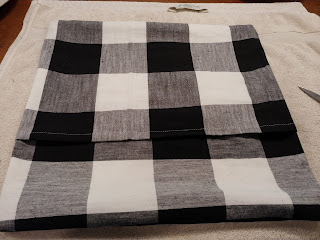
Next I cut the buffalo check fabric (the back side) a little bit wider than my tea towel and a little more than half the height. The tea towel is 18 inches tall and 18 inches wide. I cut the buffalo check 18.5 inches wide and 12 inches tall (The top piece will fold over and overlap the bottom piece later)
Next I cut the bottom piece of buffalo check also 18.5 inches wide and 12 inches tall.
The bottom piece should be overlapping the top piece when you sew it.
When it gets turned right side out, the top piece will in fact be what
is on top. But for sewing purposes, the bottom should be overlapping the
top.
These need to be the back sides of whatever fabric or tea towel you are
using. You cannot tell it from this photo, but the Halloween tea towel and the right side out of the
fabric are facing each other.
After getting everything lined up as straight as possible, I take pins around the sides where I want to sew each side. And this was actually easy because I just used the hem of the tea towel to line it all up.
I got it loaded into my sewing machine (Remember it should be inside out at this point) And I just started at the top of the tea towel. I used the tea towel hem to guide where I sewed, removing the pins along the way. It lined up very nicely and made things a lot easier. I sewed to each corner then turned it when I got to the next side.
Using the hem of the tea towel as a guide was so easy! It was actually even easier than just using one piece of fabric to make an envelope pillow cover.
You can see that there is extra fabric all away around the pillow cover.
But this is the inside of the pillow cover. No one is going to see
this. And it can be cut off. But I like to always give myself a little
bit extra fabric just in case mistakes are made.
Here is what the back side (Inside) of the pillow cover looks like. I could have hemmed the bottom edge, but you don't have to. It is hid once you turn the pillow cover right side out.
Here is what the back side looks like once you have turned it right side out. You can see that the top of the fabric covers the bottom. And the edge of it is sewn (Because you will be able to see it)
And here is what our tea towel pillow cover! I cannot believe how good it turned out. I thought sewing 3 separate pieces of fabric would be more difficult. But using the tea towels hem to guide me made it so much easier! And the 18X18 tea towels work perfectly for the Ikea inserts.
I used the Ravens Claw Inn and October 31 tea towels to make 2 pillow covers. And if I find more at Target, I plan on making extra too! This was such a fun and inexpensive project. The tea towels are only $3 each and I had extra fabric (for the back) on hand!


No comments:
Post a Comment